
Get an Email account today!
MEI Is proud to offer locally hosted email accounts, with built-in spam filtering on our own email server.
Free email accounts are included with all internet service packages. Give us a call to learn more!
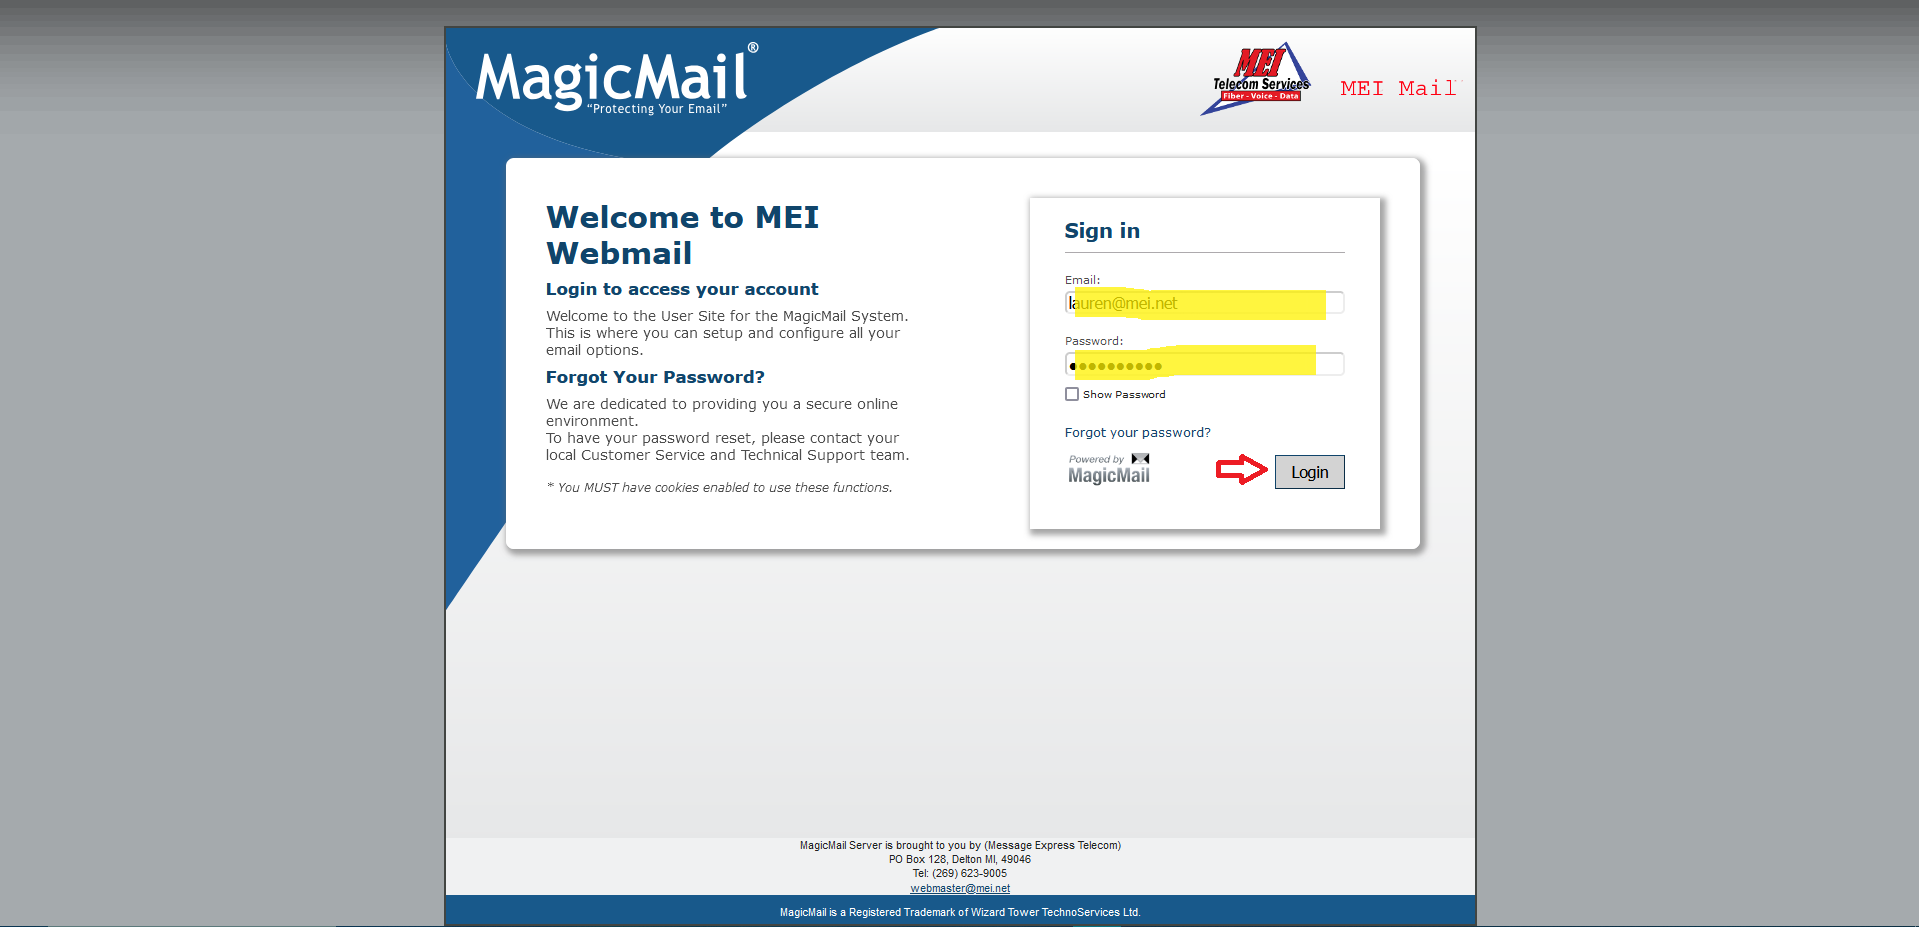
Main Login Page
Here you type your email address and password in the highlighted areas as shown. Click the Login button when you have filled out the fields.
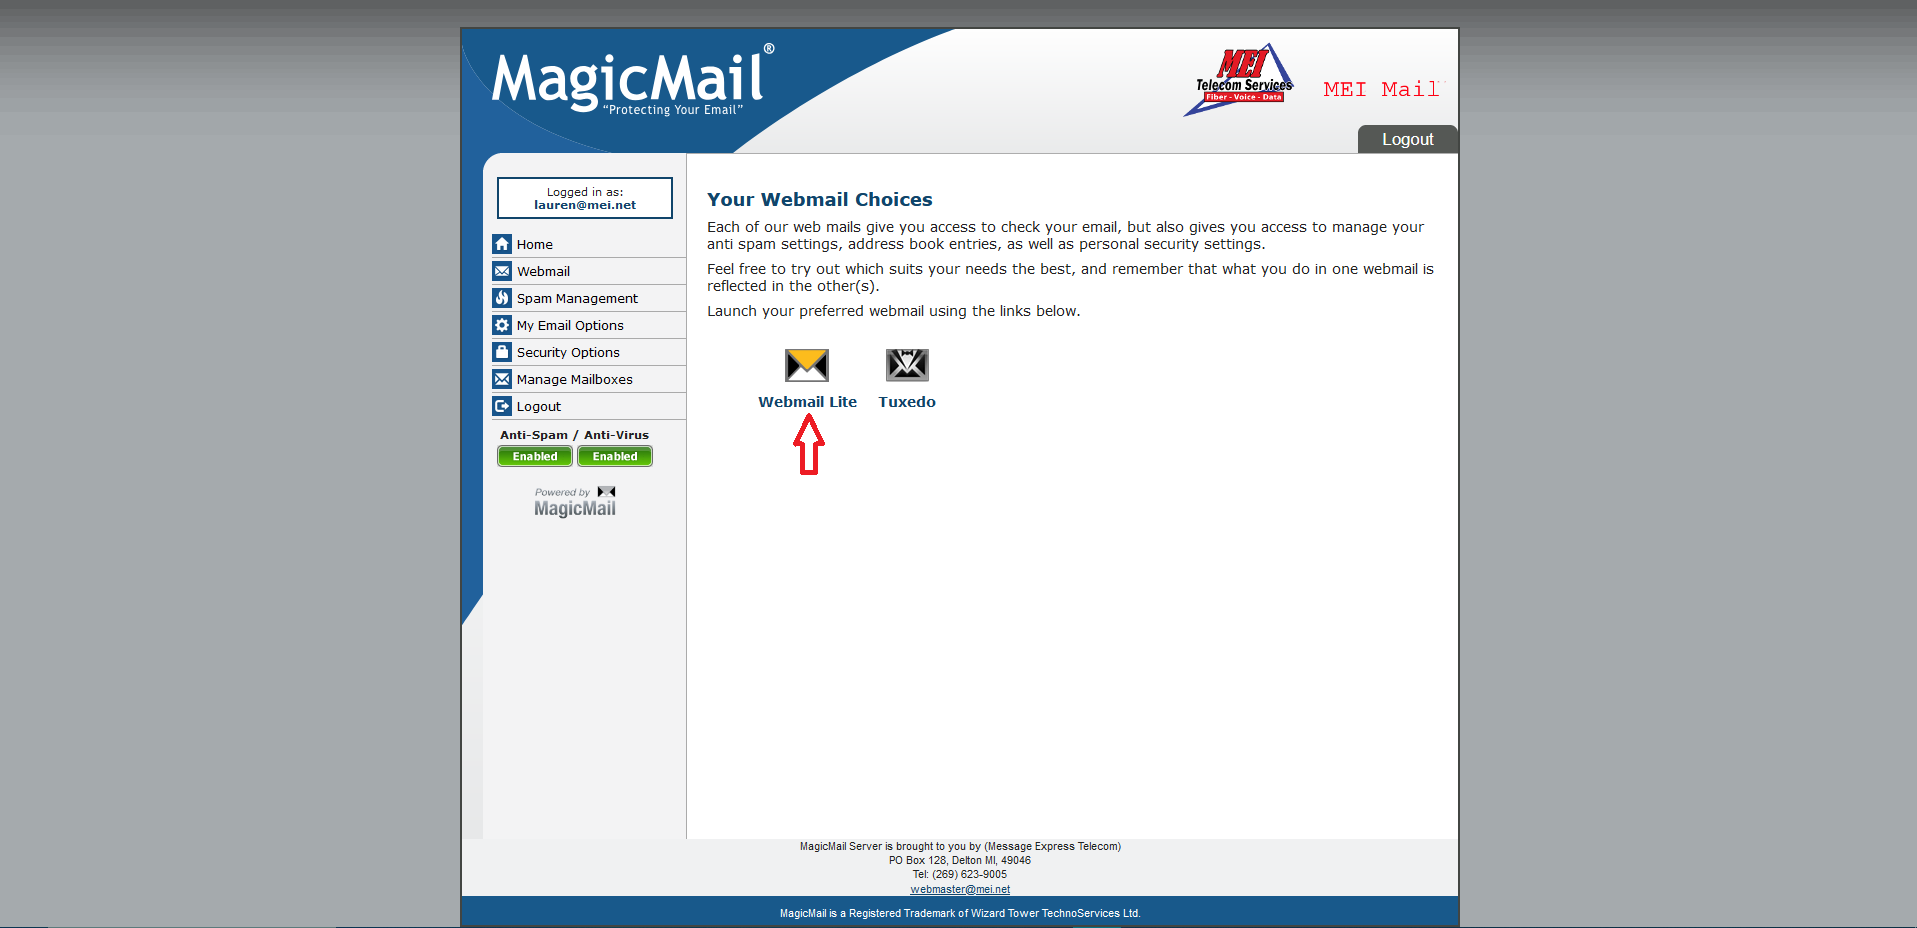
WebMail Page
Once you have logged in, you will be shown a main page where you can change settings, manage multiple mailboxes, and choose your preferred Webmail interface. If you click on 'Webmail' in the side bar underneath 'Home', you will be presented with two options. Webmail Lite and Tuxedo. Both are basically the same, they just look a little different. Webmail Lite has bigger buttons and is better for those new to Email Interfaces.
Webmail Lite
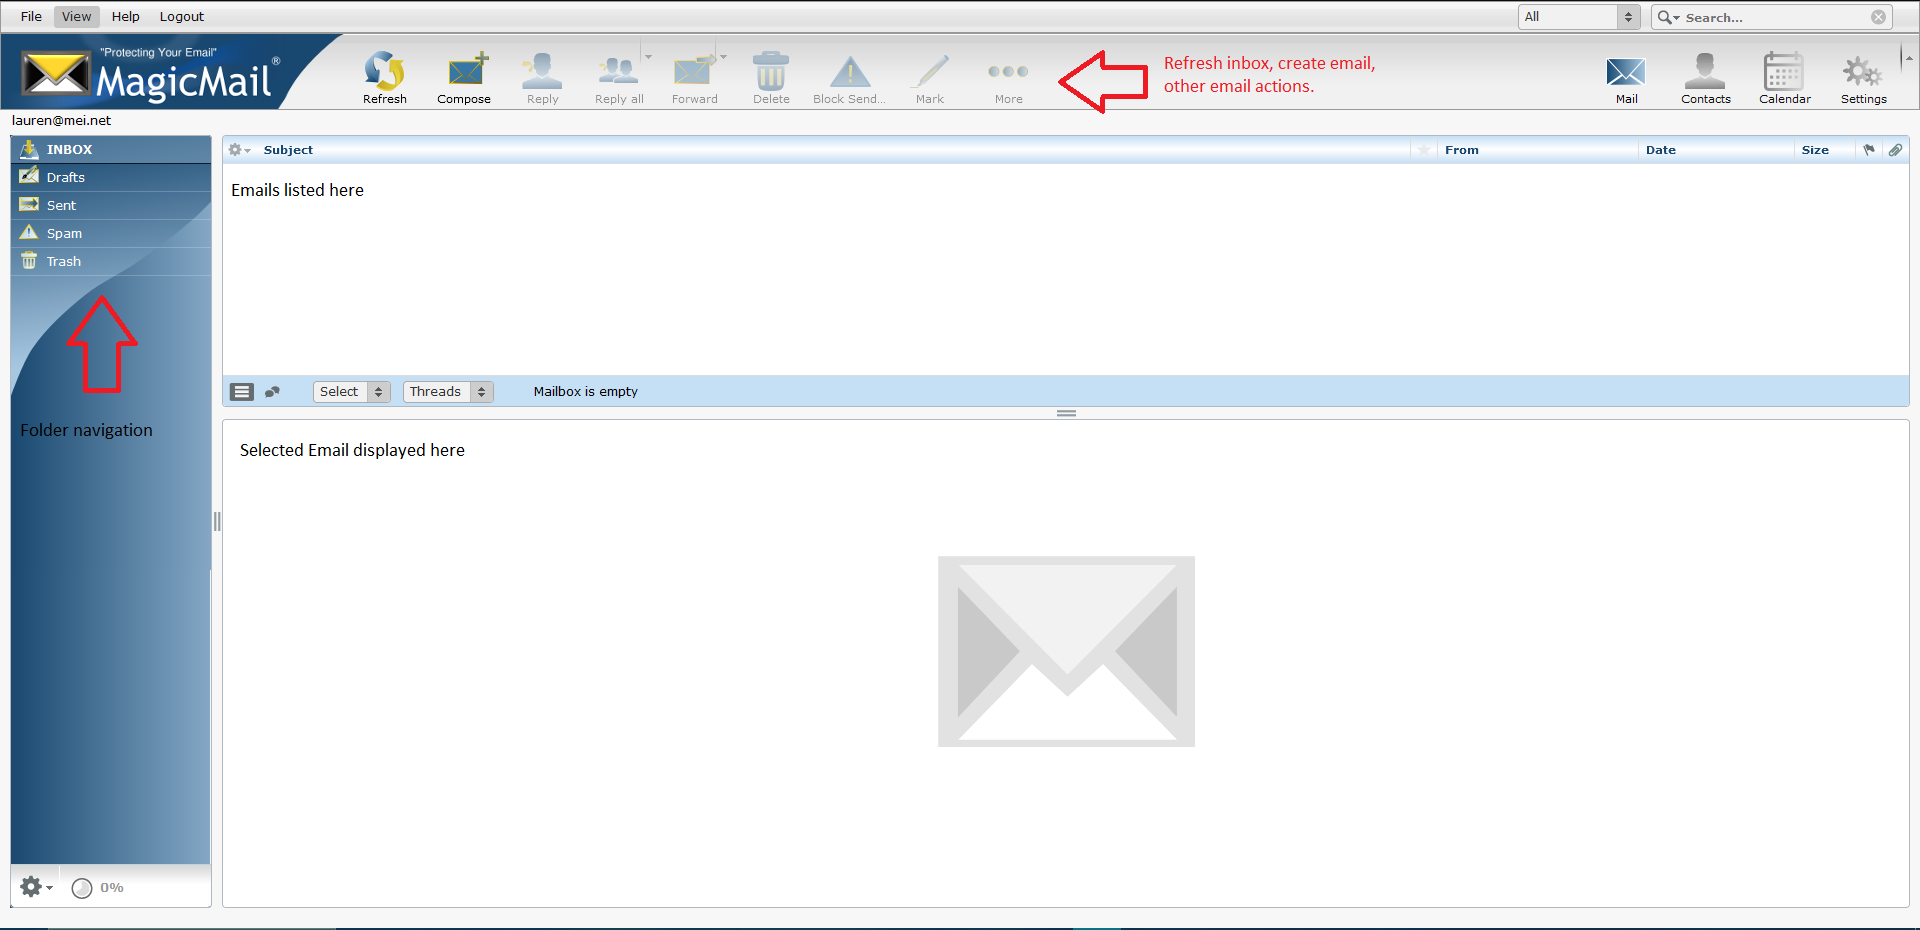
Since Tuxedo and Lite are so similar we will only be using Lite for examples. At the top in the navigation you can refresh your inbox, create an email, reply/forward delete/block, and other options. On the other side you can select mail, contacts, calendar or settings. On the left you will have your folders. You can create more folders in settings. This page is mainly where you will be to read and organize emails.
Contacts
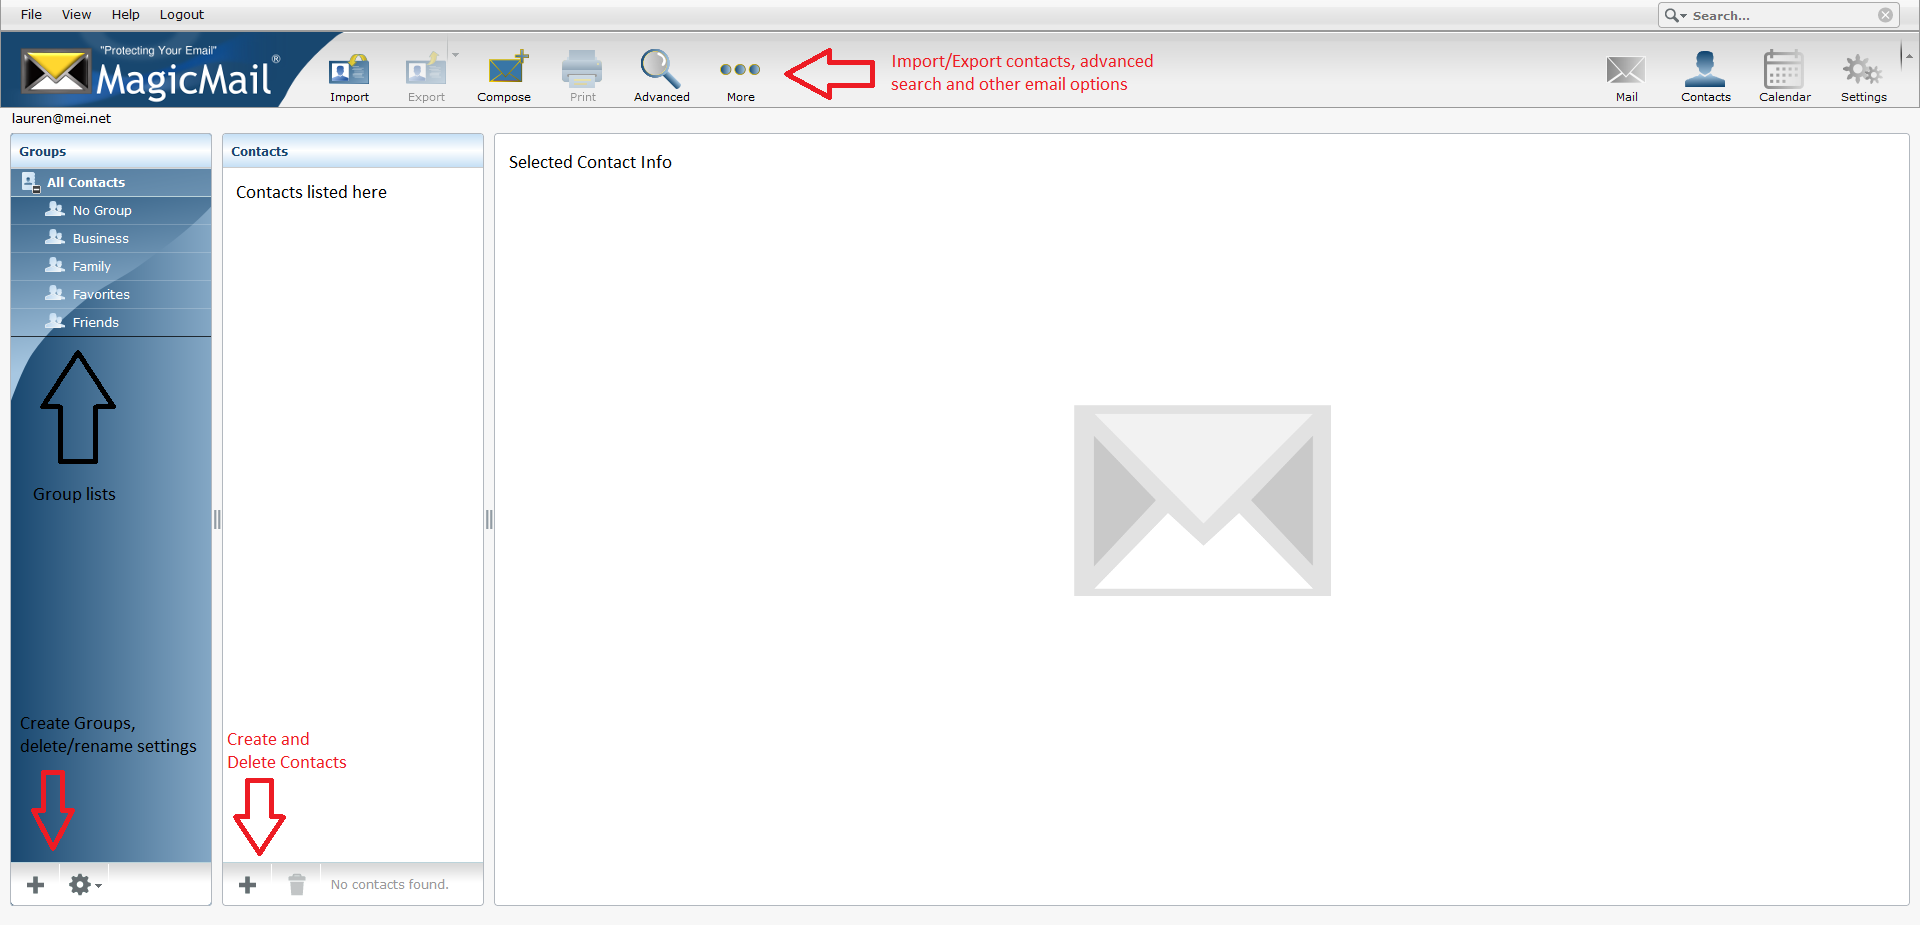
When you click on the contacts page on the upper right hand corner, this is what will come up. Here you can keep all your contacts. On the left hand side you have groups and then listed contacts. With groups you can organize your contacts. You can list all or list by group. At the bottom you can also create more groups and edit them. At the bottom of listed contacts you can create and delete contacts. At the top navigation you can import contacts from a file so you don't have to create all of them individually. You can also export contacts onto a file in your computer. You can create an email and do an advanced search for a specific contact. If you click the three dots labeled 'More', you will see if you have a contact selected you can assign/remove it from a group.
Calendar
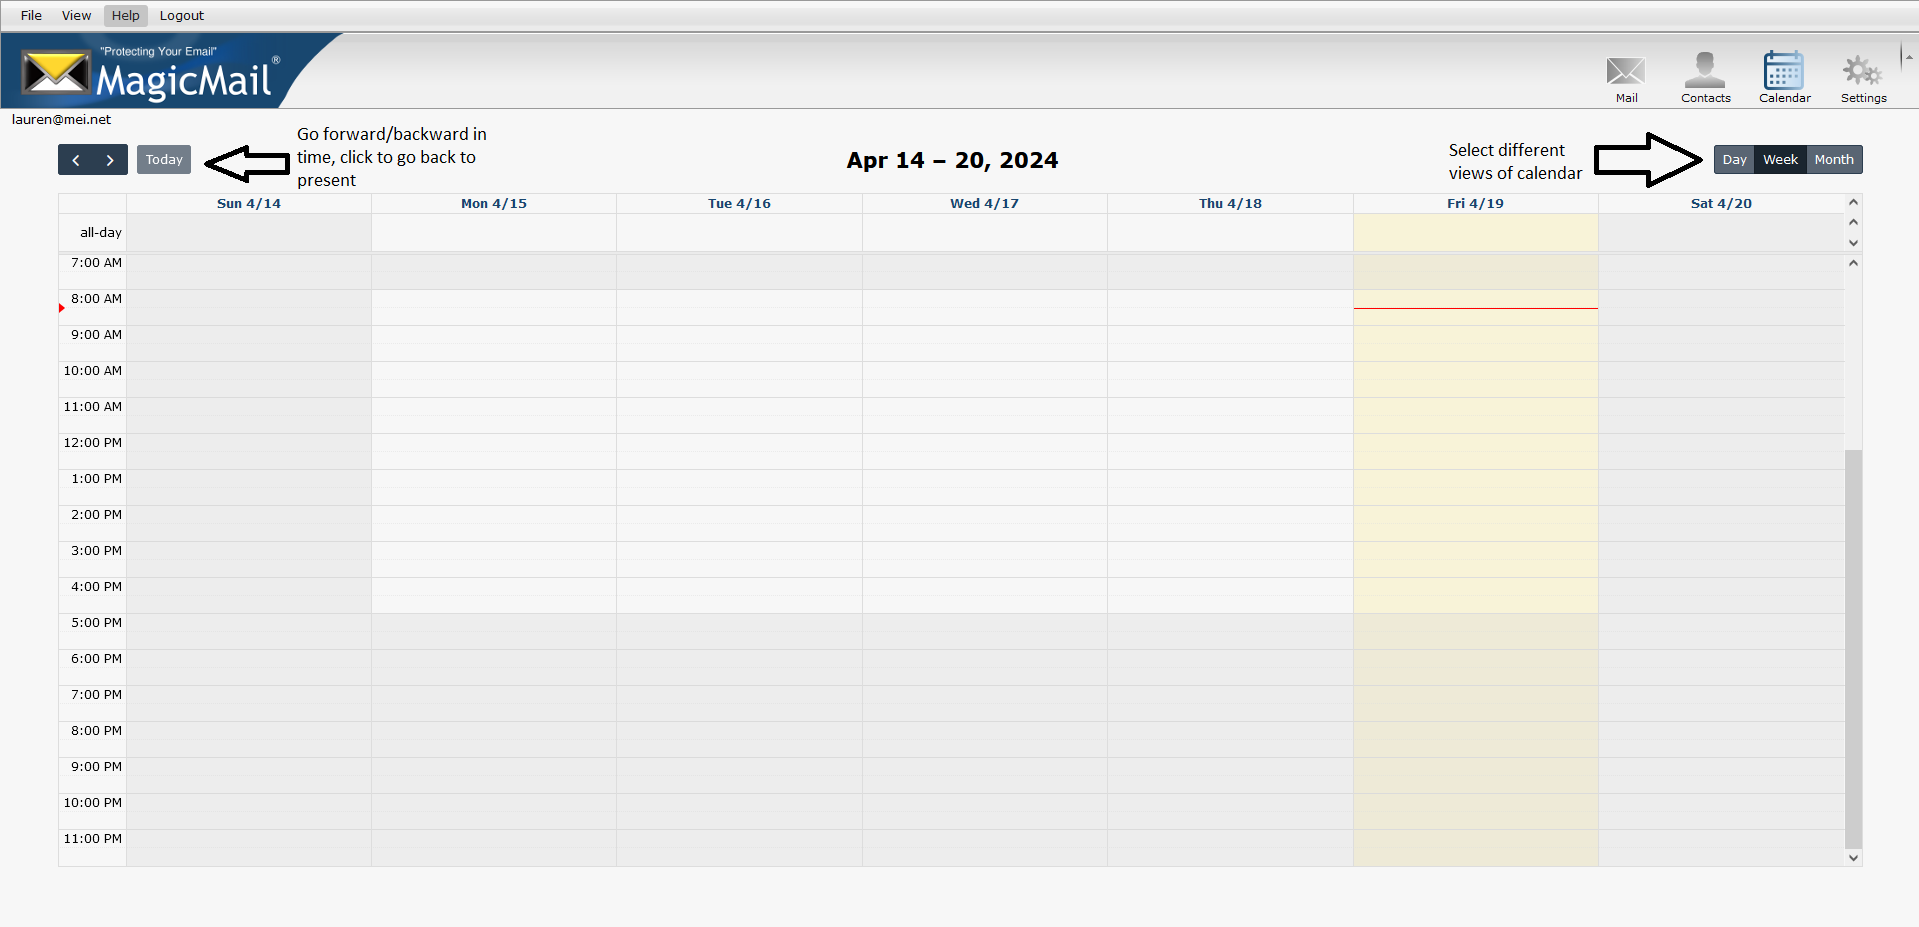
Click on the Calendar next to Contacts and it will bring up the Calendar. On the upper left you will see arrows to move you forward or backward in time and a button to go back to today. In the center it will tell you the date or time frame you are in. On the right you will see 3 different viewing modes. Day, week, and month. To make an event just click on a day and near a time the event is taking place.
Creating Events
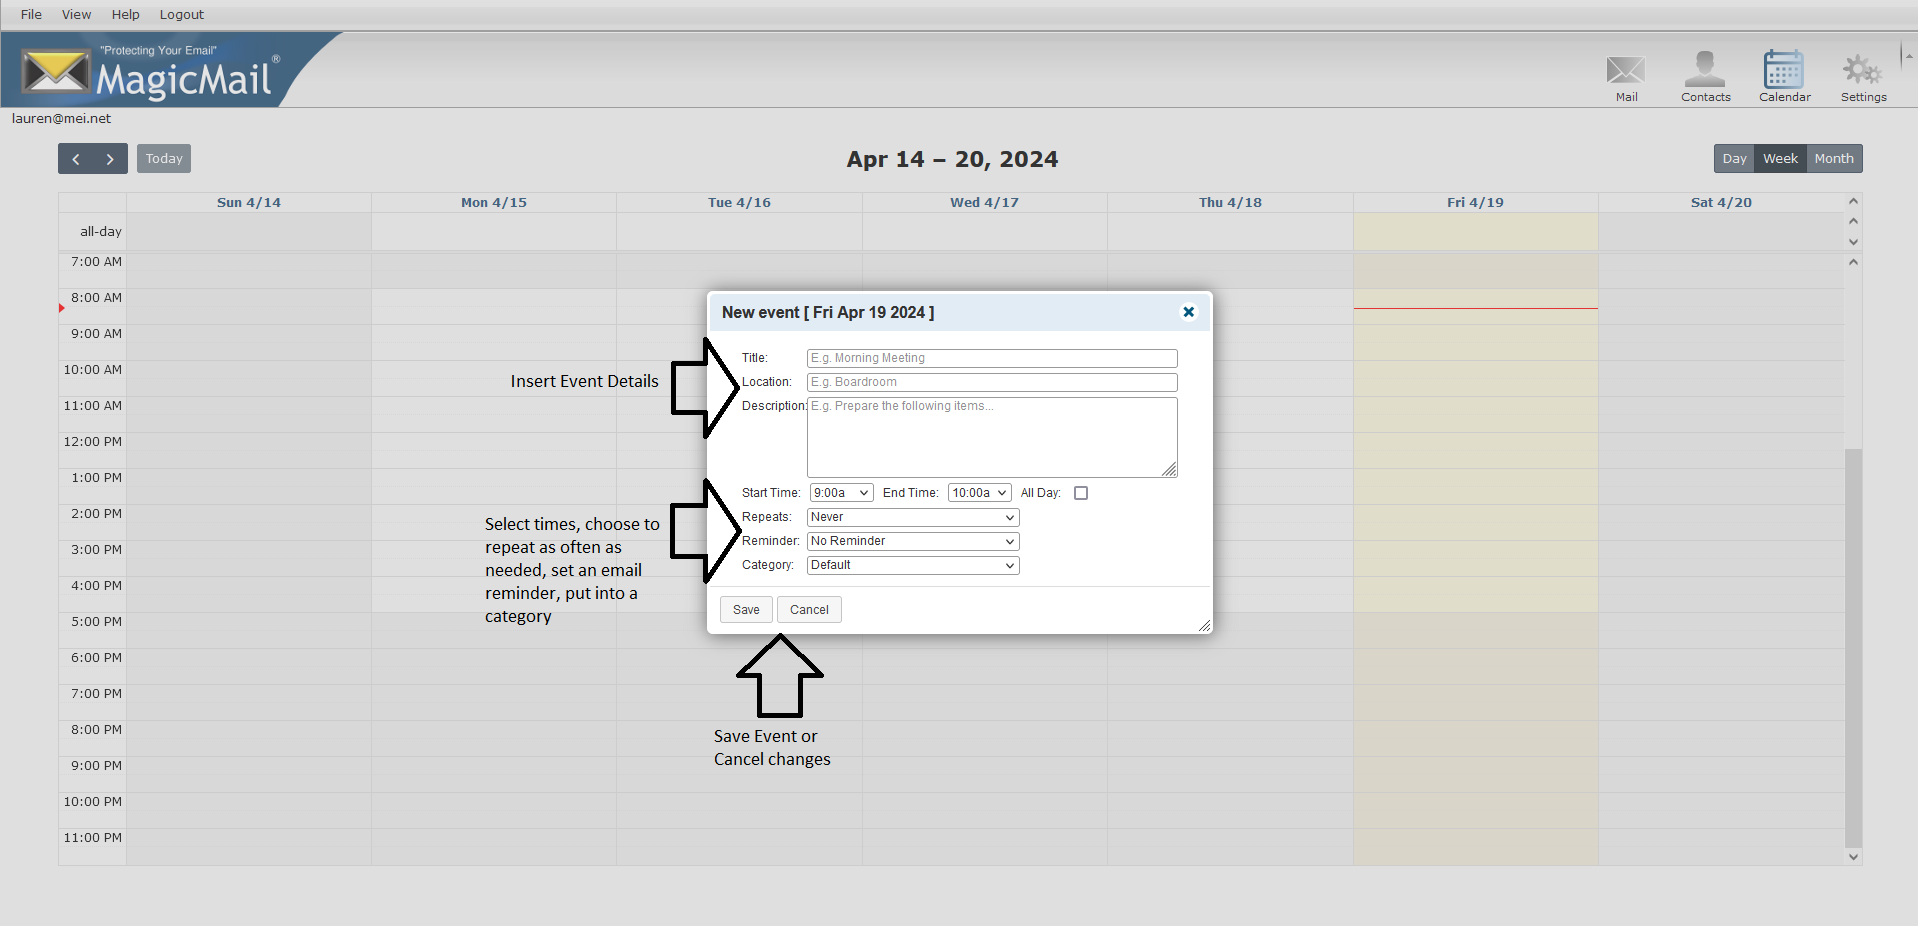
Once you have click on a day and near a time, it will prompt you to put in details of your event and allows you to select different options for the event. You can choose a specific start and stop time or have it be all day. You can have the event repeat, this is good for events that happen multiple times in a year or month. You can get an email notification so many minutes before the event happens. You can also put it under a category so you don't mix up your work and personal events. Once you are done you can click save or if you don't want to save any changes, click cancel.
Settings
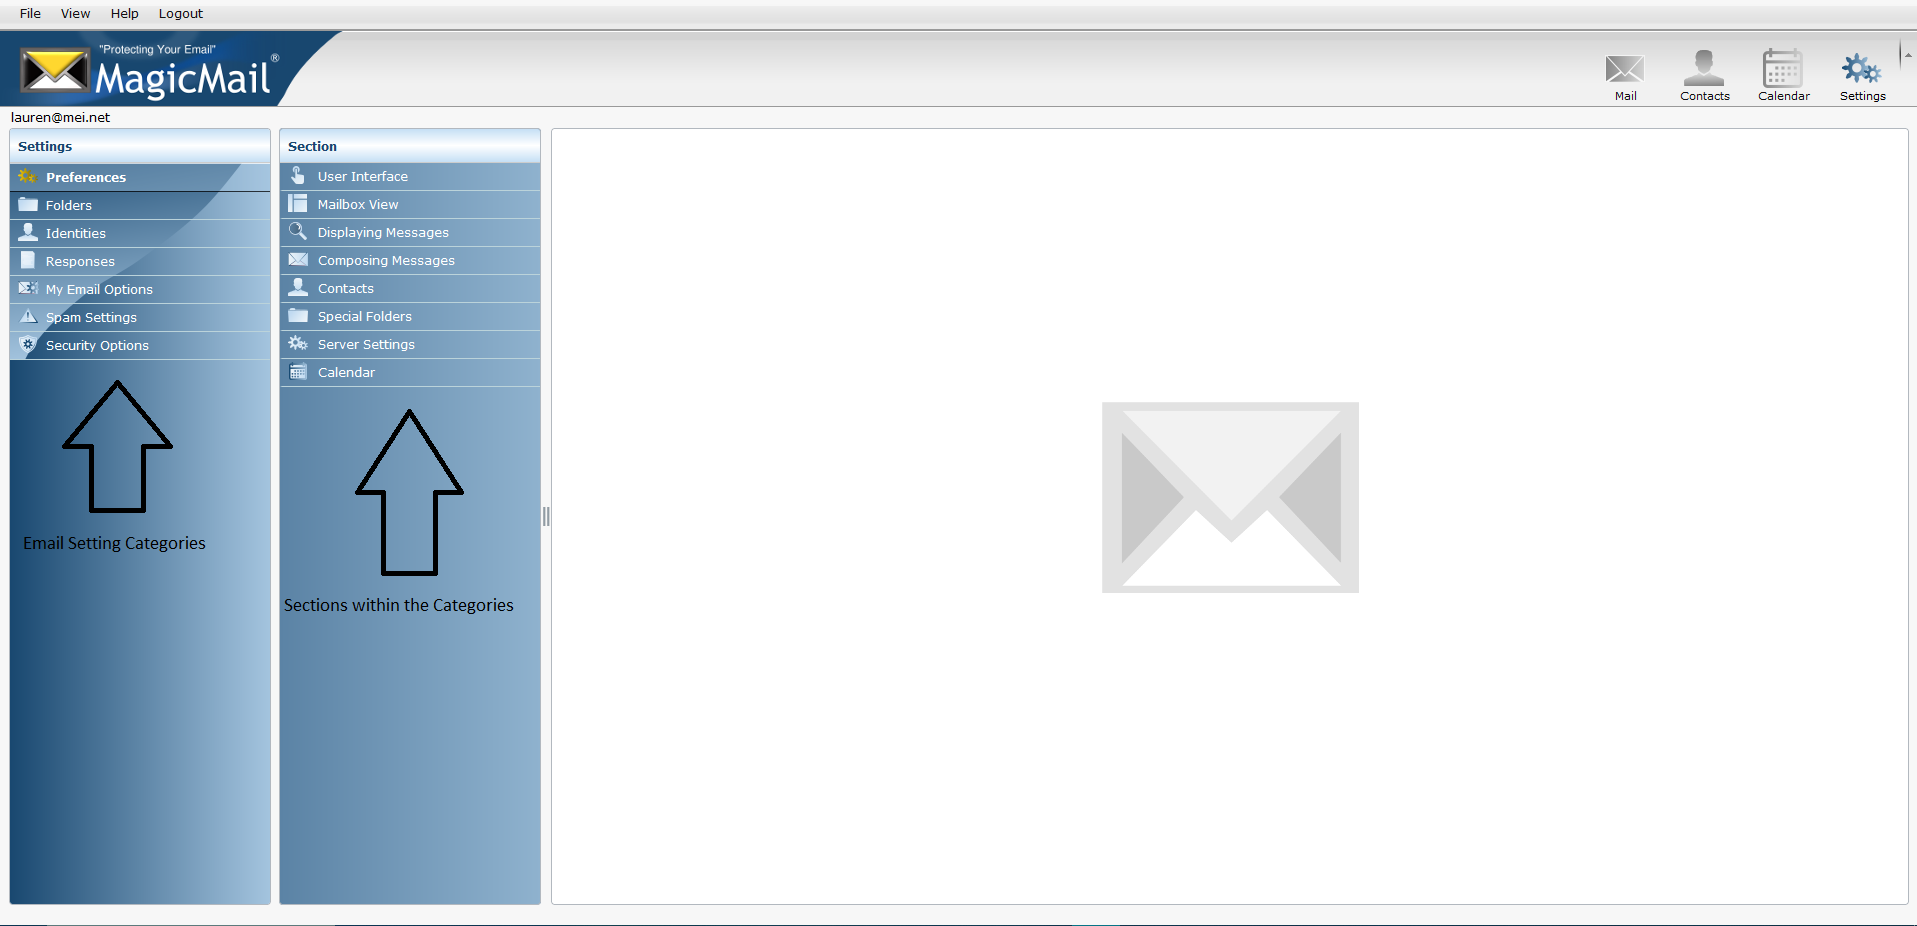
Click on the settings icon next to Calendar and you will be presented with a number of options on the left. Next to that there is a section column, some settings categories can have multiple extra options displayed here. The setting category that you may use the most is My Email Options. This is where Vacation Message/Auto Responder is located. You can also choose to forward your emails to another account if you scroll to the bottom.

Folders
Click on the folders options for settings. At the bottom of the second column you can create folders, delete/empty them too. With current folders you can also look at how much is in each one and what parent folder they have.
Spam
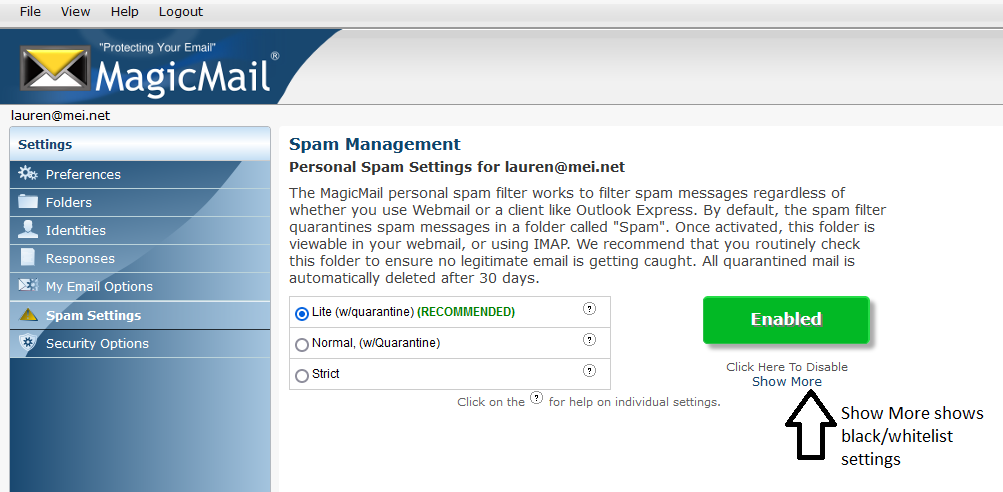
Click on Spam Settings and you will see a few options. Lite option is the first level of spam detection. If you feel you are getting far too many spam emails in your inbox then you can go up to Normal or even Strict. With Quarantine means it will all be put into a different folder, the spam folder. You should check this folder often just to be sure no important emails are getting caught there. You can even disable spam management by clicking the button that says 'Enabled'. Underneath that there is a 'Show More' link and it will open the blacklist and whitelist settings.
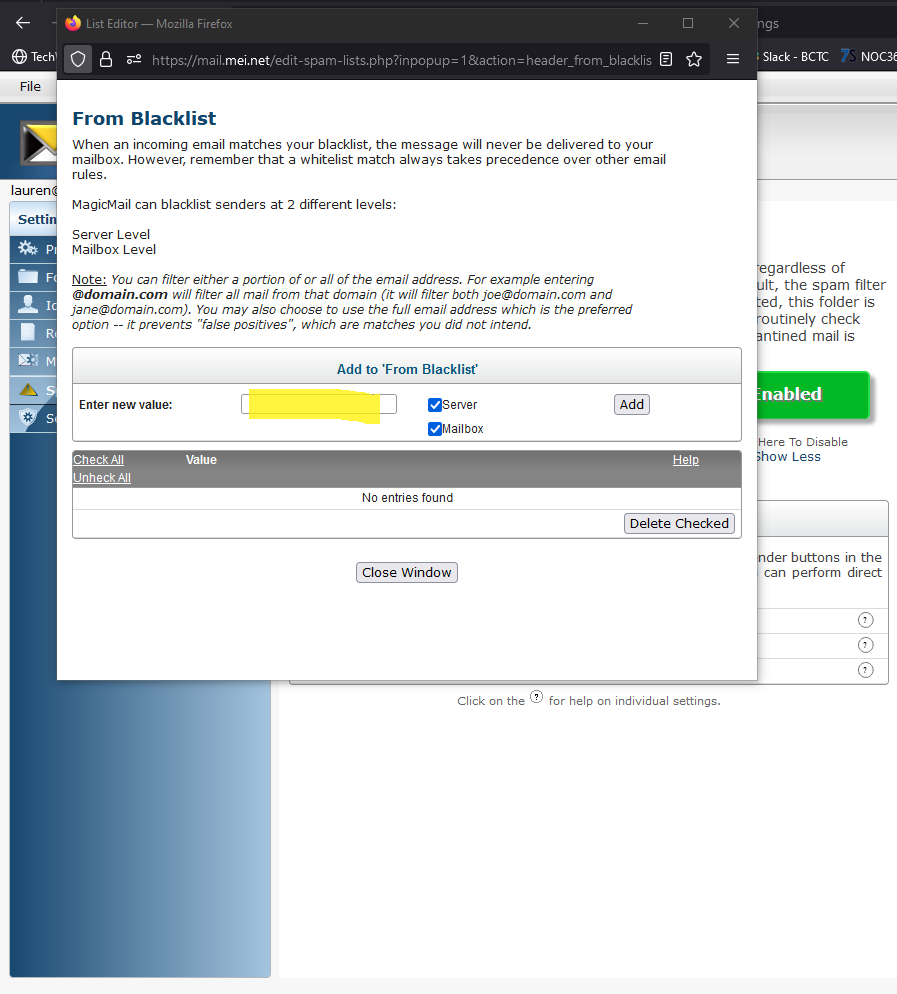
Blacklist Settings
Once you have click the 'Show More' link you should see another section that says 'Edit Spam Lists'. This will allow you to put keywords and addresses in Blacklists or Whitelists. Subject Blacklist allows you to block all messages containing certain words or phrases in the subject line. From Blacklist allows you to block certain senders. You must always enter an email address. From Whitelist allows you to make sure you always get messages from a certain sender. You must always enter an email address. Any of these lists can be edited at any time.
Email IMAP/SMTP/POP Settings
In order to use your MEI email accounts with 3rd party email clients, the following server settings must be used. Call us if you need assistance.
1. MEI.net outgoing (SMTP) mail server: smtp.mei.net
• Please choose security STARTTLS on port 587 using Normal Password authentication with your full email address (yourname@mei.net)
2. MEI.net incoming (POP3) mail server: pop3.mei.net
- The server will work without encryption on port 110, but use of this setting is discouraged.
Consider that without encryption, everyone on your LAN (e.g., a public wifi access point) can discover your password easily.
3. MEI.net incoming (IMAP) mail server: imap.mei.net
- IMAP services are on the port 143 with STARTTLS Warning: IMAP stores all mail on the server and our server space is very limited.
You will likely run into server-side-storage limit problems if you choose IMAP for your incoming server type. Please choose POP3 when possible.
- As with the services above, use of the unencrypted port 143 is discouraged.
 Call Support: 269-623-9005
 Email Support: support@mei.net
  Vist us: 107 N Grove St, Delton, MI 49046